High-Protein Banana Pudding for Ninja Creami (15-Min Recipe)
Bloom Savor >> Treats & Desserts>> High-Protein Banana Pudding for Ninja Creami (15-Min Recipe)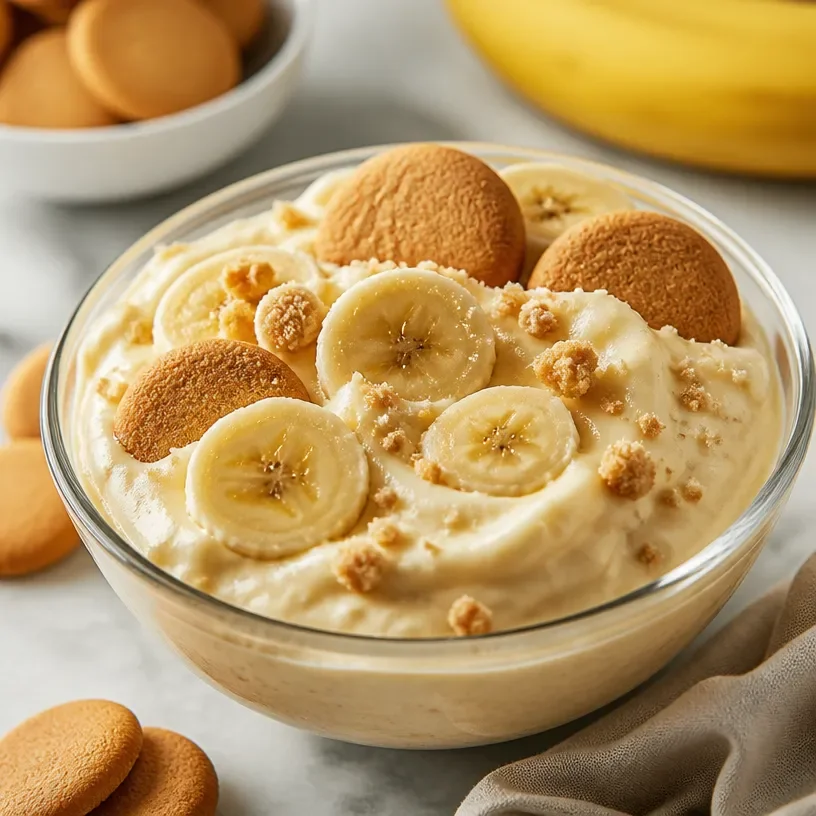
High-Protein Banana Pudding for Ninja Creami (15-Min Recipe)
Discover the Delight of Protein Banana Pudding with Your Ninja Creami
Hey there, fellow food lovers! If there’s one dessert that brings back sweet memories (pun intended) for me, it’s banana pudding. It’s the classic treat that has transported me back to sun-soaked summer afternoons, surrounded by family and laughter, all while diving into creamy, dreamy layers of goodness. Today, I’m taking that nostalgia and giving it a delightful twist—enter the Protein Banana Pudding Ninja Creami!
Why is this combo so fantastic, you ask? Well, not only does it maintain the creamy texture you love, but it also packs a nutritional punch with protein to keep you fueled throughout the day. The Ninja Creami makes it super easy to whip up this indulgent dessert without any fuss. So grab your apron, and let’s create this delicious memory together while staying mindful of our health!
A Sweet Memory
I vividly remember the day my grandmother brought out her famous banana pudding at our family picnic. The anticipation was palpable as we took our seats on the picnic blanket—everyone knew dessert was going to be the highlight of the gathering. She would layer the vanilla wafers, banana slices, and her special pudding, which was fluffy, rich, and nestled in the bottom of a Tupperware bowl, waiting for our eager spoons. As I helped her assemble the layers, she taught me that good food is all about patience and celebration. Now, years later, I’m still inspired by her joy in the kitchen. This Protein Banana Pudding is my tribute to her, a way to cherish those memories while also crafting a treat that aligns with today’s wellness trends.
Ingredients
Here’s what you’ll need to whip up this irresistible treat, along with some handy tips:
-
Fairlife Milk (or milk of choice): I love using Fairlife because it’s ultra-filtered and contains more protein and less sugar than regular milk. You can also substitute it with your favorite non-dairy milk like almond or oat for a creamy texture.
-
Greek Yogurt (or cottage cheese): Greek yogurt adds creaminess and a protein boost! Not a fan of yogurt? Cottage cheese is a great swap that can provide similar creaminess while still keeping it light.
-
Protein Powder: A key player in this recipe! Choose your favorite flavor—vanilla works well, but chocolate can add a fun twist. In a pinch, you can omit it, but you’ll lose some of that protein punch.
-
Flavor-Specific Ingredients: You’ll want bananas—ripe ones for the best sweetness—and vanilla extract for that aromatic depth. If you’re feeling adventurous, add some nutmeg or cinnamon for warmth.
-
Natural Sweetener: Use maple syrup or honey sparingly to sweeten your pudding without overpowering the banana flavor. If you’re looking to cut sugar entirely, ripe bananas often provide enough natural sweetness.
Step-by-Step Instructions
Now, let’s bring our Protein Banana Pudding to life! Just follow these easy steps, and watch as this delicious creation comes together.
-
Gather Your Ingredients: Start by assembling all your ingredients in one spot. It makes the process smoother, and you won’t be scrambling halfway through.
-
Blend the Base: In a blender, combine 1 cup of Fairlife milk, 1 cup of Greek yogurt, 1 scoop of protein powder, and 1 tablespoon of vanilla extract. Blend until smooth and creamy. The key here is to ensure there are no lumps—so keep blending until you reach a silky texture.
-
Mash the Bananas: In a separate bowl, take 2 ripe bananas and mash them until smooth. I like to leave small chunks for texture, but you can choose how smooth you want it. The riper, the sweeter, so don’t hold back if you have some extra ripe bananas lying around!
-
Combine Mixtures: Gently fold the mashed bananas into your blended base. This is essential for combining the flavors without losing that delightful creaminess. If you wander too close to the “overmix” line, you may lose the lightness!
-
Sweeten It Up: Taste your mixture. If you need a boost of sweetness, add your preferred natural sweetener—maple syrup or honey is a great choice here. Blend again briefly, just to mix in the sweetener without overworking the batter.
-
Chill and Process in the Ninja Creami: Pour the mixture into the Ninja Creami container, making sure to fill it to the appropriate line. Place it in the freezer for at least 24 hours (this is the hardest part—waiting is tough!). After it’s fully frozen, process it according to your Ninja Creami instructions until you achieve that airy, soft-serve texture.
-
Serve and Enjoy: Scoop out your creamy banana pudding, and get ready to dive in! Add some extra banana slices or crumbled vanilla wafers on top for texture and those classic notes we grew up loving.
Serving Suggestions
When it comes to serving, presentation is everything! I like to scoop the banana pudding into cute dessert cups or bowls. Top it beautifully with extra banana slices and a sprinkle of crushed vanilla wafers. This not only enhances the flavor but also adds a delightful crunch. For a little flair, you can drizzle some chocolate syrup or sprinkle cinnamon on top!
Recipe Variations
Feel like switching things up? Check out these fun twists:
-
Chocolate Lover’s Delight: Add chocolate protein powder instead of vanilla, and throw in some chocolate chips for that extra indulgence.
-
Tropical Twist: Mix in diced pineapple or coconut flakes for a sunny Caribbean vibe.
-
Nutty Banana Pudding: Throw in some almond or peanut butter for a satisfying twist that adds healthy fats and a creamy texture.
-
Sugar-Free Version: Use a sugar-free sweetener to cut the calories while keeping the flavor intact.
-
Dairy-Free Delight: Swap Fairlife Milk and Greek yogurt for non-dairy alternatives like almond milk and coconut yogurt.
Chef’s Notes
Oh, let me tell you, this recipe has evolved dramatically over the years! Initially, my banana pudding was a guilty pleasure that I never thought could be adapted to fit a health-conscious lifestyle. However, the more I experimented in the kitchen, the more I realized that we don’t have to sacrifice enjoyment for nutrition! This journey has brought so much joy into my cooking while enabling me to share the delish goodness with family and friends.
It’s interesting how a simple recipe can transform into something meaningful. Just like my grandmother’s teachings, food should be participatory and captivating. Please share your own memories using this recipe; I’d love to hear how it inspires you!
FAQs and Troubleshooting
Q: Can I make this in a regular bowl instead of a Ninja Creami?
A: Absolutely! If you don’t have a Ninja Creami, you can just mix everything together in a bowl and freeze it in an airtight container. Stir occasionally until it reaches the desired pudding-like texture, though it won’t be as smooth and airy.
Q: What if my pudding is too runny?
A: If it turns out too runny, you might want to add a bit more protein powder or Greek yogurt. Alternatively, some additional time in the freezer can help thicken it up.
Q: Can I use frozen bananas?
A: Yes! Frozen bananas work well, especially if you’re looking for an ultra-creamy texture. Just make sure to allow them to thaw slightly before mashing.
Q: How long will it last in the freezer?
A: Your creation can last up to two weeks in the freezer if stored correctly. Just make sure it’s sealed tightly to prevent freezer burn!
Nutritional Info
While the nutritional content can vary based on specific brands and your ingredient choices, a rough estimate for one serving (1/2 cup) could be:
- Calories: 150-200
- Protein: 10-15g
- Carbohydrates: 20-25g
- Fat: 2-5g
Don’t forget to adjust based on any ingredient swaps you make!
So there you have it, folks—an enticing, nutritious, and nostalgic Protein Banana Pudding you can whip up with your Ninja Creami! I hope it brings as much joy to your kitchen as it does to mine. Are you ready to add a little blooming flavor to your life? Trust me; your taste buds will thank you! Happy cooking, and remember, cooking is just as much about sharing love as it is about the food.
Related Post
Minute High-Protein Crumbl Maple Cinnamon Roll Cookies
Protein Crumbl Maple Cinnamon Roll Cookie: A Sweet Twist on a Classic Ah, cookies—the ultimate…